Setup an automated Android CI with Gitlab and Jenkins
A few months ago, I started FreshRSS for Android, a modern Android client for FreshRSS. During my career, I’ve had the chance to almost always work with a correct continuous integration platform. So I took habits. Among them, the habit of relying on running unit tests, integration tests and lint analysis on the CIP.
It started with my first job. We set up a Jenkins server for my development team. And I never stopped using it ever since. I could, of course, have switched to something more hype like GitlabCI or Travis but, you know, I like using self-hosted services and I know Jenkins far better than anything else…
So let’s rock!
Install and configure Jenkins
Have Jenkins ready to serve
My Jenkins is hosted on https://jenkins.christophe-henry.dev. This server runs on a Fedora. I used the provided Jenkins RPM repository to install it. I’ve been a Mageia packager for a few years so I always use official repos when I can. Packagers know how to do their job. Installing from official packages is quite simple. Just follow Jenkins’ wiki.
Ok, so we have our Jenkins instance. But it’s not ready to be used yet. You most likely use
a reverse proxy in front of your Jenkins. I personnaly use Apache. And, again, I know Nginx
get all the attention these days. But I am not an experienced admin sys and I don’t have much
time to learn so I do with what I already know. There’s
a full page on Jenkins’ wiki
on how to run Jenkins behind Apache. To easier your pain a bit since this page is very verbose
and it’s sometimes hard to get what is mandatory and what is not, I’ll just give you my own configuration.
It’s an Ansible template. So just replace the {{ }} variables to what is relevant for you.
<VirtualHost *:80>
	ServerName {{ jenkins_domain }}

	ErrorLog {{ jenkins_log_dest }}/jenkins_error.log
	CustomLog {{ jenkins_log_dest }}/jenkins_access.log combined

	<LocationMatch "!/.well-known/acme-challenge/*">
		Redirect permanent / https://{{ jenkins_domain }}/
	</LocationMatch>

	<IfModule mod_http2.c>
		Protocols h2 http/1.1
	</IfModule>
</VirtualHost>

<VirtualHost *:443>
	ServerName {{ jenkins_domain }}

	ErrorLog {{ jenkins_log_dest }}/jenkins_error.log
	CustomLog {{ jenkins_log_dest }}/jenkins_access.log combined

	SSLEngine on
	SSLCompression off
	SSLSessionCacheTimeout 300
	SSLCertificateFile {{ letsencrypt_certs_home }}/{{ jenkins_domain }}/fullchain.pem
	SSLCertificateKeyFile {{ letsencrypt_certs_home }}/{{ jenkins_domain }}/privkey.pem

	Header merge Strict-Transport-Security max-age=15768000

	<IfModule mod_http2.c>
		Protocols h2 http/1.1
	</IfModule>

	<Location / >
		ProxyPass http://127.0.0.1:{{ jenkins_running_port }}/ nocanon redirect="" timeout=600
		ProxyPassReverse http://127.0.0.1:{{ jenkins_running_port }}/
		ProxyPassReverse http://{{ jenkins_domain }}/
		ProxyPreserveHost On
		LimitRequestBody 8192
		RequestHeader set X-Forwarded-Proto "https"
		RequestHeader set X-Forwarded-Port "443"
	</Location>

	AllowEncodedSlashes NoDecode
</VirtualHost>
A few more components to install
Google seems not to be publishing its Android images for ARM anymore. From API level 27 and up, you only have choice between x86 and x64 architectures for your image. But you won’t be able to boot AVD without first installing Qemu and KVM.
On Fedora (names may defer depending on your distribution), you’ll need:
- qemu-kvm
- libvirt
- bridge-utils
- virt-install
dnf install qemu-kvm libvirt bridge-utils virt-install
Official documentation on this matter can be found here.
Up to this step, your Jenkins installation should be working. There’s one last step
to do. I, personnaly choosed to run my pipeline inside a Docker image. This
easiers usage of the Android SDK and solves access problems since your Jenkins
instance will run on the jenkins user whereas some Android SDK commands require
to be executed as root. To let Jenkins use Docker, you need to add the jenkins
user to the docker group.
usermod jenkins -G docker
Configuring Jenkins
Now that you can reach Jenkins, you need to get it ready to work together with Gitlab and build Android projects.
Setup additionnal pipeline steps for AVD
In order to run Android’s instumented tests, you’ll need to start virtual devices. As usual, there’s a nice Jenkins library for this: instil/jenkins-pipeline-steps.
To make it available for your jenkinsfiles, you need to go to /configure on your
Jenkins instance, in section Global Pipeline Libraries, click the add button and
fill the form like this:
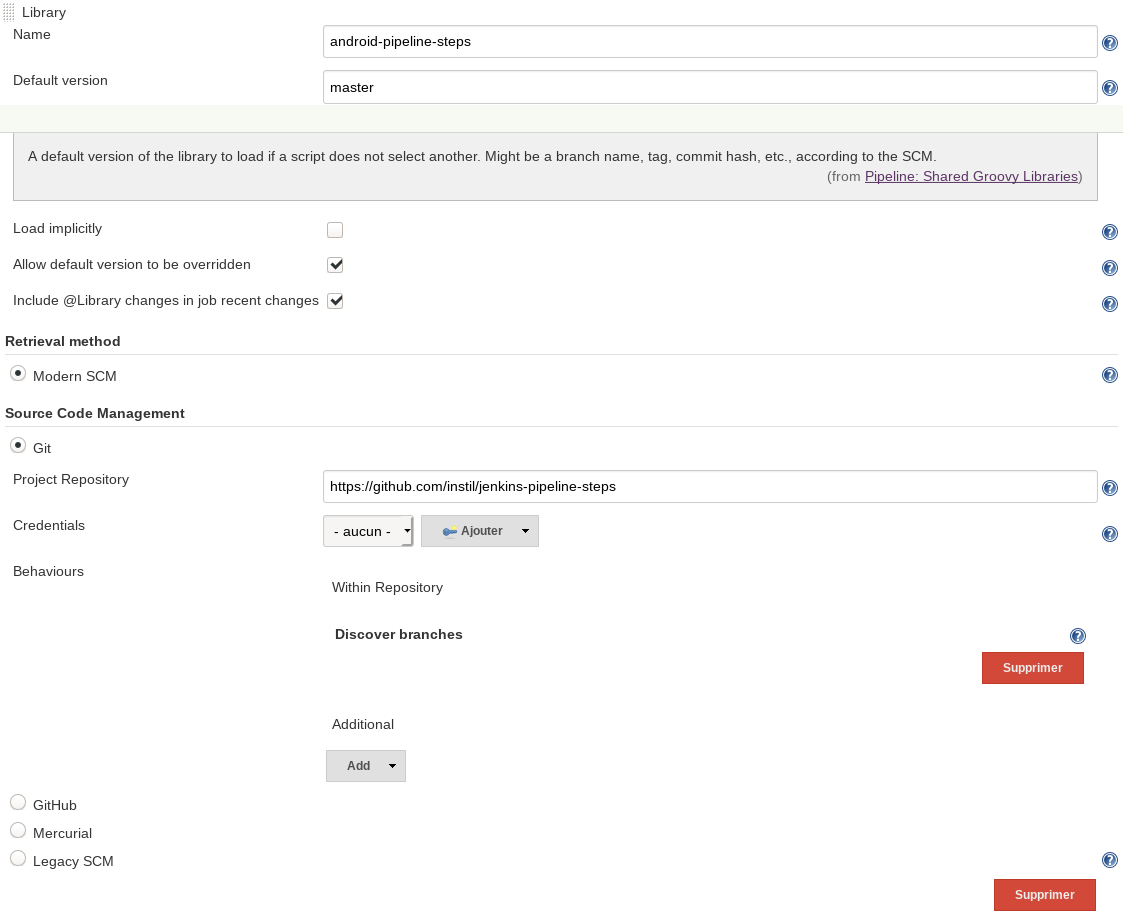
Then, the library’s pipeline steps become available to load in your Jenkinsfile.
Just add library "android-pipeline-steps" in your first stage block.
Setup a Gitlab connection
Having the status of a Jenkins build directly in your Gitlab MR is a must-have. This lets you know when tests have passed and tell Gitlab to automatically merge the request as soon as tests have passed.
To allow Jenkins communicate with Gitlab, you can use Jenkins’ Gitlab plugin. Note that it has been officially unmaintained for 2 years now but it’s totally usable in most cases. A few nice-to-have features are missing but it still works.
So, when gitlab-plugin is installed, go to /configure and configure
your Gitlab connection in the Gitlab section. Nothing difficult here.
Just set a name you will refer to in your Jenkinsfile, the HTTP address
on your Gitlab instance and an API token you can setup in /profile/personal_access_tokens
on your Gitlab instance. The Gitlab plugin will need the api and read_repository
scopes to set pipeline status.
Trigger builds on push
You can tell Gitlab to trigger builds
as soon as someone pushes on any branch (including branches of open MRs on forked repositories).
To configure this, go to /<user>/<project>/-/settings/integrations on your
Gitlab instance. Your will be able to trigger a new build on several events
available on that page.
The configuration guide is available on the webhook section
of gitlab-plugins README.
I encourage you to use a multibranch job which is simpler to configure. Please refer to the documentation linked above for a fine-grain configuration.
The pipeline
Here, I’ll go through my Jenkins pipeline step by step then provide you
the full Jenkinsfile.
Since Jenkins pipeline will run on Docker, you need a Docker image embedding the
Android SDK. I, personnaly choosed bitriseio/docker-android.
You’ll need to pass a few custom Docker options in order to correctly run your pipeline.
First, you need to link the /etc/passwd so that your Docker image knows about your
host machine’s users. You’ll also need to run your processes as root inside your container
(some Android SDK commands requires it).
If you choosed to run your tests on bitriseio/docker-android like me,
you shoud know that it doesn’t ship with a Qemu/KVM installation.
So, the emulator won’t be able to access /dev/kvm. You need to run your
Docker image with the --priviledged option to let her access to /dev/kvm.
Weirdly, bitriseio/docker-android doesn’t set the ANDROID_HOME environment
variable which is mandatory to run your tests. You must set it to
/opt/android-sdk-linux.
To finish, your build may generates files owned by root in Jenkins workspace (on your host). You may be unable to clean build because of this. So don’t forget to change ownership of your build workspace when it’s done.
Here is the full Docker config in your Jenkinsfile:
pipeline {
    agent {
        docker {
            image "bitriseio/docker-android"
            args "-v /etc/passwd:/etc/passwd:ro -u root --privileged"
        }
    }

    environment {
        ANDROID_HOME = "/opt/android-sdk-linux"
    }

    post {
        always {
            sh "chown -R jenkins ${env.WORKSPACE}"
        }
    }
}
The tests
Now that Jenkins is fully configured, we’re ready to write actual tests steps. I, personnally, have 6 stages:
stages {
    stage("Pre") {
        steps {
            updateGitlabCommitStatus name: "Job", state: "running"
            updateGitlabCommitStatus name: "Pre", state: "running"
            library "android-pipeline-steps"
        }
        post {
            failure {
                updateGitlabCommitStatus name: "Pre", state: "failed"
            }
            success {
                updateGitlabCommitStatus name: "Pre", state: "success"
            }
        }
    }
    stage("Compile") {
        steps {
            updateGitlabCommitStatus name: "Compile", state: "running"
            sh "./gradlew compileReleaseSources"
        }

        post {
            failure {
                updateGitlabCommitStatus name: "Compile", state: "failed"
            }
            success {
                updateGitlabCommitStatus name: "Compile", state: "success"
            }
        }
    }
    stage("Lint") {
        steps {
            updateGitlabCommitStatus name: "Lint", state: "running"
            sh "./gradlew spotlessApply lint"
            sh "./gradlew lintRelease --continue"
            androidLint pattern: "**/lint-results-*.xml"
            publishHTML([
                allowMissing         : false,
                alwaysLinkToLastBuild: true,
                keepAll              : false,
                reportDir            : "$WORKSPACE/app/build/reports/",
                reportFiles          : "lint-results-release.html",
                reportName           : "HTML Report",
                reportTitles         : ""
            ])
        }

        post {
            failure {
                updateGitlabCommitStatus name: "Lint", state: "failed"
            }
            success {
                updateGitlabCommitStatus name: "Lint", state: "success"
            }
        }
    }
    stage("Unit tests") {
        steps {
            updateGitlabCommitStatus name: "Unit tests", state: "running"
            sh "./gradlew testReleaseUnitTest --info"
            junit "**/test-results/**/*.xml"
            publishHTML([
                allowMissing         : false,
                alwaysLinkToLastBuild: true,
                keepAll              : false,
                reportDir            : "$WORKSPACE/app/build/reports/tests/testReleaseUnitTest",
                reportFiles          : "index.html",
                reportName           : "Junit test report",
                reportTitles         : ""
            ])
        }

        post {
            failure {
                updateGitlabCommitStatus name: "Unit tests", state: "failed"
            }
            success {
                updateGitlabCommitStatus name: "Unit tests", state: "success"
            }
        }
    }
    stage("Instrumented tests on min SDK image") {
        steps {
            updateGitlabCommitStatus name: "Instrumented tests on min SDK image", state: "running"
            withAvd(hardwareProfile: "Nexus 5X", systemImage: env.MIN_SDK_IMAGE, headless: true) {
                sh "./gradlew clean connectedDebugAndroidTest"
            }
        }

        post {
            failure {
                updateGitlabCommitStatus name: "Instrumented tests on min SDK image", state: "failed"
            }
            success {
                updateGitlabCommitStatus name: "Instrumented tests on min SDK image", state: "success"
            }
        }
    }
    stage("Instrumented tests on target SDK image") {
        steps {
            updateGitlabCommitStatus name: "Instrumented tests on target SDK image", state: "running"
            withAvd(hardwareProfile: "Nexus 5X", systemImage: env.TARGET_SDK_IMAGE, headless: true) {
                sh "./gradlew clean connectedDebugAndroidTest"
            }
        }

        post {
            failure {
                updateGitlabCommitStatus name: "Instrumented tests on target SDK image", state: "failed"
            }
            success {
                updateGitlabCommitStatus name: "Instrumented tests on target SDK image", state: "success"
            }
        }
    }
}
Initialization
Since, as far as I am aware of, there is no pre directive in Jenkins’ pipeline similar
to the post directive, I perform some initialisation in a Pre stage.
One of them is sourcing the additionnal build steps library that
I talked about earlier.
The other is setting a global Job commit status. This is useful to make Gitlab’s “Merge when build has succeeded” button to correctly work.
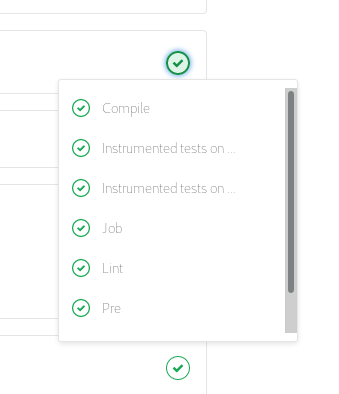
Note: updateGitlabCommitStatus is the function where you can specify
the status of your different build stages displayed by the Pipeline section at the
top of your merge request:
Since there’s no way to inform Gitlab of the number of stages the job has, and all of them are executed sequencially, it considers that the job has succeeded as soon as every stage it knows has succeeded. And it will merge the merge request just after the first stage has succeeded and before Jenkins had time to inform Gitlab that a second stage has started. So you can find yourself in a situation where your MR has been merged before the job is completely done and a later stage has failed. And you have then a regression in your code.
To prevent that to happen, you can set a global Job stage status that will resolve only when all your other stages have suceeded or failed.
Compile, lint, test, etc.
The rest of the Jenkinsfile is pretty straightforward.
The Lint stage performs static analysis of my code using Android’s linter and Spotless and I archive the results using Jenkins’ Android lint plugin and HTML publisher plugin.
The Instrumented tests stages run the instrumented tests inside a
virtual device using withAvd’s steps available in
the additionnal pipeline steps
that I sourced during the Pre stage.
And each of these steps update the Gitlab commit status at the begining and at the end.
The full Jenkinsfile at the time of writing this article is available
on FreshRSS Android’s Gitlab repo.
Conclusion
With the rise of GitlabCI, Jenkins tends to lose ground to its competitor. Despite this decline, it remains the major build system of many organisations that set up a continuous integration platform many years ago and I think that this article is still relevant and may help some people working with Gitlab, Jenkins and Android.
Due to lack of time, I wrote it many weeks after I put it all together. And it’s possible I forgot a few details. If this is the case and some things are missing or no longer working, feel free to contact me by email.